Thursday, June 11, 2015

The Card Concept #37 The Butterfly Effect

I wanted to try a different style of card for the my entry in the Card Concept Challenge blog #37 the butterfly effect. Clean and Layered is the style of card that I am going to try my hand at today. Definition for Clean and Layered is as follows:

  • clean lines
  • lots of layers
  • designer papers / embossing
  • embellishments / accents
  • clean and fresh looking
  • some colored images at times
  • white space


I started my card with stamping three butterflies with versamark ink on white vellum and heat embossing them in white. Then I glued on my sequins with multi medium matte. While that was drying I took three colors of ink and a strip of water color paper and blended the three colors of ink in a row. The water color strip was also coated it with pink perfect pearls then when it was dry I die cut the word believe. To glue my vellum piece to the plain white card base I turned over my vellum panel and put glue behind each of the sequins, then I adhered it to the card base.
I glued down my sentiment and added a wink of stella to the butterfly wings for a final touch.  Unfortunately it is very difficult to get the shimmer of the wings to show up in the pictures.
Hopefully I achieved the look of clean and layer that I was going for with this card today. I was inspired by the butterflies, the white lines of the icing, and some of the colors. Please leave me some feed back if you would, it would mean a great deal to me if you would. 

Supplies:
Recollections 110 lbs white card stock
Recollections white vellum
Lawn Fawn' s Flutter By Stamp set
Hero Arts white embossing powder
Zig clear wink of Stella
Pretty Pink Posh peony color 6mm sequins
Simon Says Stamp moonshine mix
Artist loft 140lbs water color paper
Wplus 9's Sweet gelato, Miami spice, and Bloomsberry dye ink
Tim Holtz's Holiday words script die


Wednesday, June 10, 2015

My favorite buttons

I got my order from My Favorite Things today, hurray for paper crafting goodies in the mailbox. This was the first time I have ordered from them it was so hard to decide what to get because there are so many things to pick from and they had a new June release here lately too. I really wanted the lace background stamp but I was to late getting to it and it was sold out.... bummer. Oh, well I guess that means I will have to wait and order it later on. But one of the things I like about MFT (My Favorite Things) is that you get a free die if you order $60 worth of stuff. This month they had a cute button die that embosses too. That's what I am show casing in my card today.
I started off running a piece of water color paper through my cuttlebug, with the embossing mat (the embossing mat was also part of what I ordered from MFT) and button die. After that I water colored the  buttons each design of button in a certain color. The colors were from a color swatch that I have on one my Pintrest boards. Yes, I am a Pintrest junkie.  My husband use to give me a hard time about Pintrest till I showed him he could pin motorcycle and car stuff too. Now he has his own Pintrest account too. While the buttons were drying I took my Lawn Fawn "thanks" die cut and cut three layers of heavy white card stock and one of the dark grey swiss dot print; I stacked them and glued them all together. Then I adhered a 4.25 x5.5 piece of kraft card stock on my plain white card base. My button water color panel was also die cut with a Mama Elephant stitched border. I glued all the pieces together and trimmed it with some Coral Lawn Fawn twine. The next week or so I am sure you will get to see more of the goodies that I ordered from MFT.


Monday, June 8, 2015

Father's day fishing card


I don't know about you but I find cards for guys hard to make. It is hard because I want to add sequins, or a wink of stella (very tastefully of course, in moderation.) But I like flowers and feminine things so making a manly card is a challenge. Maybe I am just picky about what masculine stamps I like? 


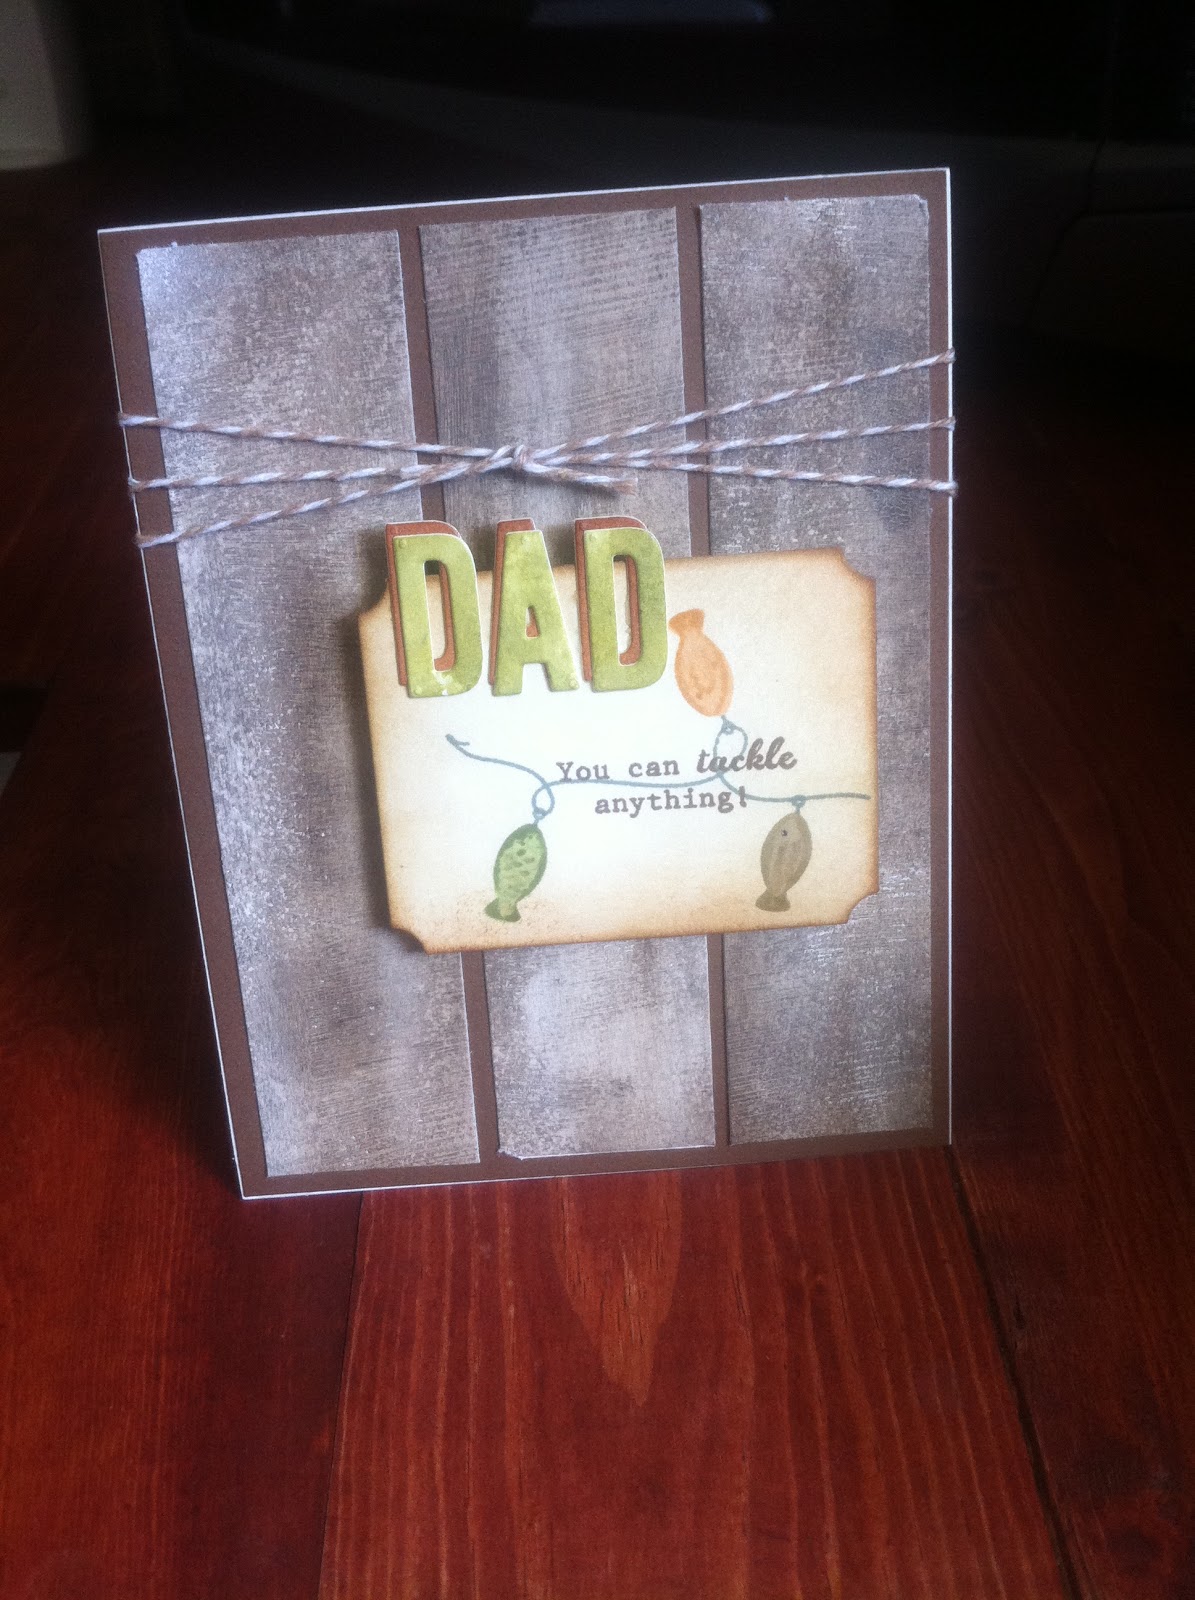
I made this card for Simon Says Stamp Wednesday Challenge. Their theme this week is make it masculine. So, in readiness for Father's day I made a fishing card. The back ground is something I have done on some other cards I have posted lately. It is gessoed paper with gelatos in brown, grey, and silver blended with my finger. Then you cut the paper to resemble planks. I stamped the fishing line and fish from WPlus 9's Fish More stamp set. I love some of the sentiments in this stamp set.  The letters are die cut from Lawn Fawn's Cole's ABC's die; I die cut two pieces of water colored paper that had been smooshed with peeled paint and vintage photo. The sentiment panel has antique linen blended on it and vintage photo around the edges too.
Then to assemble the card I took a white card base (4.24x5.5) and glued down some chocolate card stock, then the planks, then the sentiment panel was popped up on white fun foam. Very last I added a some tan and white twine.


So, when he opens this on Father's day my husband will know the kids and I think, " You can tackle anything! " After all he is one incredible Daddy and Husband, we are certainly blessed to have him.

Sympathy Card Trio

Today I made a trio of cards using the same sentiment. I started with my blending tool and some of my distress inks.  The first one used mermaid lagoon, salty ocean, peacock feathers, and cracked pistachio.
I used my MISTI to stamp the tree and grass on my panel with versafine black onyx ink and used clear ultra  fine embossing powder to heat embossing them. Then I cut the panel with a circle die. After that I   dry embossed a piece of white paper with a wood grain embossing folder. I cut a strip of vellum and heat embossed the sentiment in silver Hero Arts embossing powder. To assemble my card cut a circle in my white wood panel and sandwiched the vellum strip in between the the circle and the white wood negative. Then I mounted on black piece of card stock and on a white card base.


The second card only used three colors: mustard seed, spice marmalade, and festive berries. This card was more of a clean and simple design. I sprinkled water drops on the distress ink panel and blotted away the water and let it dry. Then I stamped the lamp, lamp post, and sentiment with black versafine ink and heat embossed them with ultra fine clear Hero Arts embossing powder. After mounting this to a white card base this was completed.


 And the third card I used: dusty concord, victorian velvet, and tattered rose. I die cut the distress panel with a mama elephant die that had a stitched outline. Then I stenciled the flowers with the Tim Holtz wildflower stencil and seedless preserves  paint and silver craft paint. While that was drying I die cut a scalloped panel with another Mama Elephant die and then colored it with Copic markers. (N0, N2, N4, N6) I mounted the ombre distress ink panel on white craft foam and then adhered it the Copic grey panel that was glued to the card base. For a finishing touch I added some Simon Says Stamp moonshine sequins.

Sympathy cards are not always easy to make, but they are ver important to those that receive them. It is good to minster comfort to those who are hurting because you may never know the difference that you may make in their life simply because you were there for them.

Sunday, June 7, 2015

Watercolor Flamingo card


Welcome to my blog, on this lovely Sunday. You may have made your way here from the Pretty Pink Posh watercolor blog hop. Water coloring is one of my favorite mediums, I am by no means a pro but by I do enjoy it and I hope to learn more as I practice. Sandy Allnock has been a wonderful inspiration and I have learned things by following her blog lately.

For my card I decided to try something I haven't ever done on a card before.  I had an old National Geographic magazine laying around that had photos of flamingos in it. They have such lovely color. So, I decided to try my hand at drawing a flamingo and painting it with my set of Kuretake Gansai Tambi water colors.
 I am also hopping my card is different from anything else that you will see on this blog hop too, since my flamingo was drawn by hand and not stamped. I cut my water color panel to fit most of the front of a 4 and a quarter by 5 and a half card. After that I stamped a strip of diagonal strips with WPlus 9's fairy dust dye ink.  And I adhered it on the card base next to the water color base. My sentiment was stamped with Black Onynx Versafine ink and heat embossed with Hero Arts ultra fine clear embossing powder.
For a final touch I added some Simon Says Stamp moonshine sequins. (My pretty pink posh sequins that I ordered on there way.)  Hopefully you enjoyed this card that I made with a flamingo standing in the surf wishing someone a colorful hello.

Tuesday, June 2, 2015

Happy thoughts - art journal

So, I got the die cut from Lawn Fawn called party balloons. We have had a lot of rain lately and the gray skies have been kinda gloomy and I needed something cheerful to work on. This page has been a work of servral days, whenever I can get the time in between cooking, cleaning, and the kids.

I started off with stamping butterflies on just any old white tissue paper I found in the gift wrapping holder in the closet. The ink I used was WPlus 9's coconut husk and the butterflies was from their Flora and Fauna 2 stamp. After that was dry I glued it to my notebook page with Faber-Castell gel medium.  Right now I am just using a plain cheap notebook that I have on handle I hope to try a Dyllusions notebook in the future. After the gel medium was dry I got out three colors of distress paints: mermaid lagoon, broken china, and seedless preserves. Dabbing them on randomly and blending them with my fingers and baby wipe was lots of messy fun.
 While the page was drying I got out three sizes of balloons and five colors of distress inks. I die cut the balloons from white card stock and blended them with squeezed lemonade, spiced marmalade, peacock feathers, picked raspberry, and cracked pistachio. For the highlight on the balloons I just got a q-tip wet and dabbed the upper left of each balloon a few times. When all of the balloons and background where dry I arranged them  and glued them with Ranger's multi medium matte, but just a dot in the middle leaving the edges loose so I could get the strings under the balloons later.
Using black emborderioy thread I tied (three strands thick) a string to each balloon and fished the them behind the other balloons, pulling them tight and securing them with two staples criss crossed in a X. I stamped random  uplifting words from different stamp sets on scraps of paper and trimed them down in different shapes to scatter across the balloons. When that was done I took a scrap of water color paper and smooshed it with spiced marmalade distress ink and let it dry. I die cut the happy from the happy birthday die from Simon Says Stamp and the letters from Lawn Fawn's Cole's ABC's die. The sentiment was adhered with gel medium.
And that was my art journal layout, reminding me to have happy thoughts. I have a Pintrest art journal board if you want to check out any other of my art journal layouts. I am also entering this Simon Says Stamp Wednesday Challenge they have an "Anything Goes" challenge going on right now.

Monday, June 1, 2015

Something glided, something gold

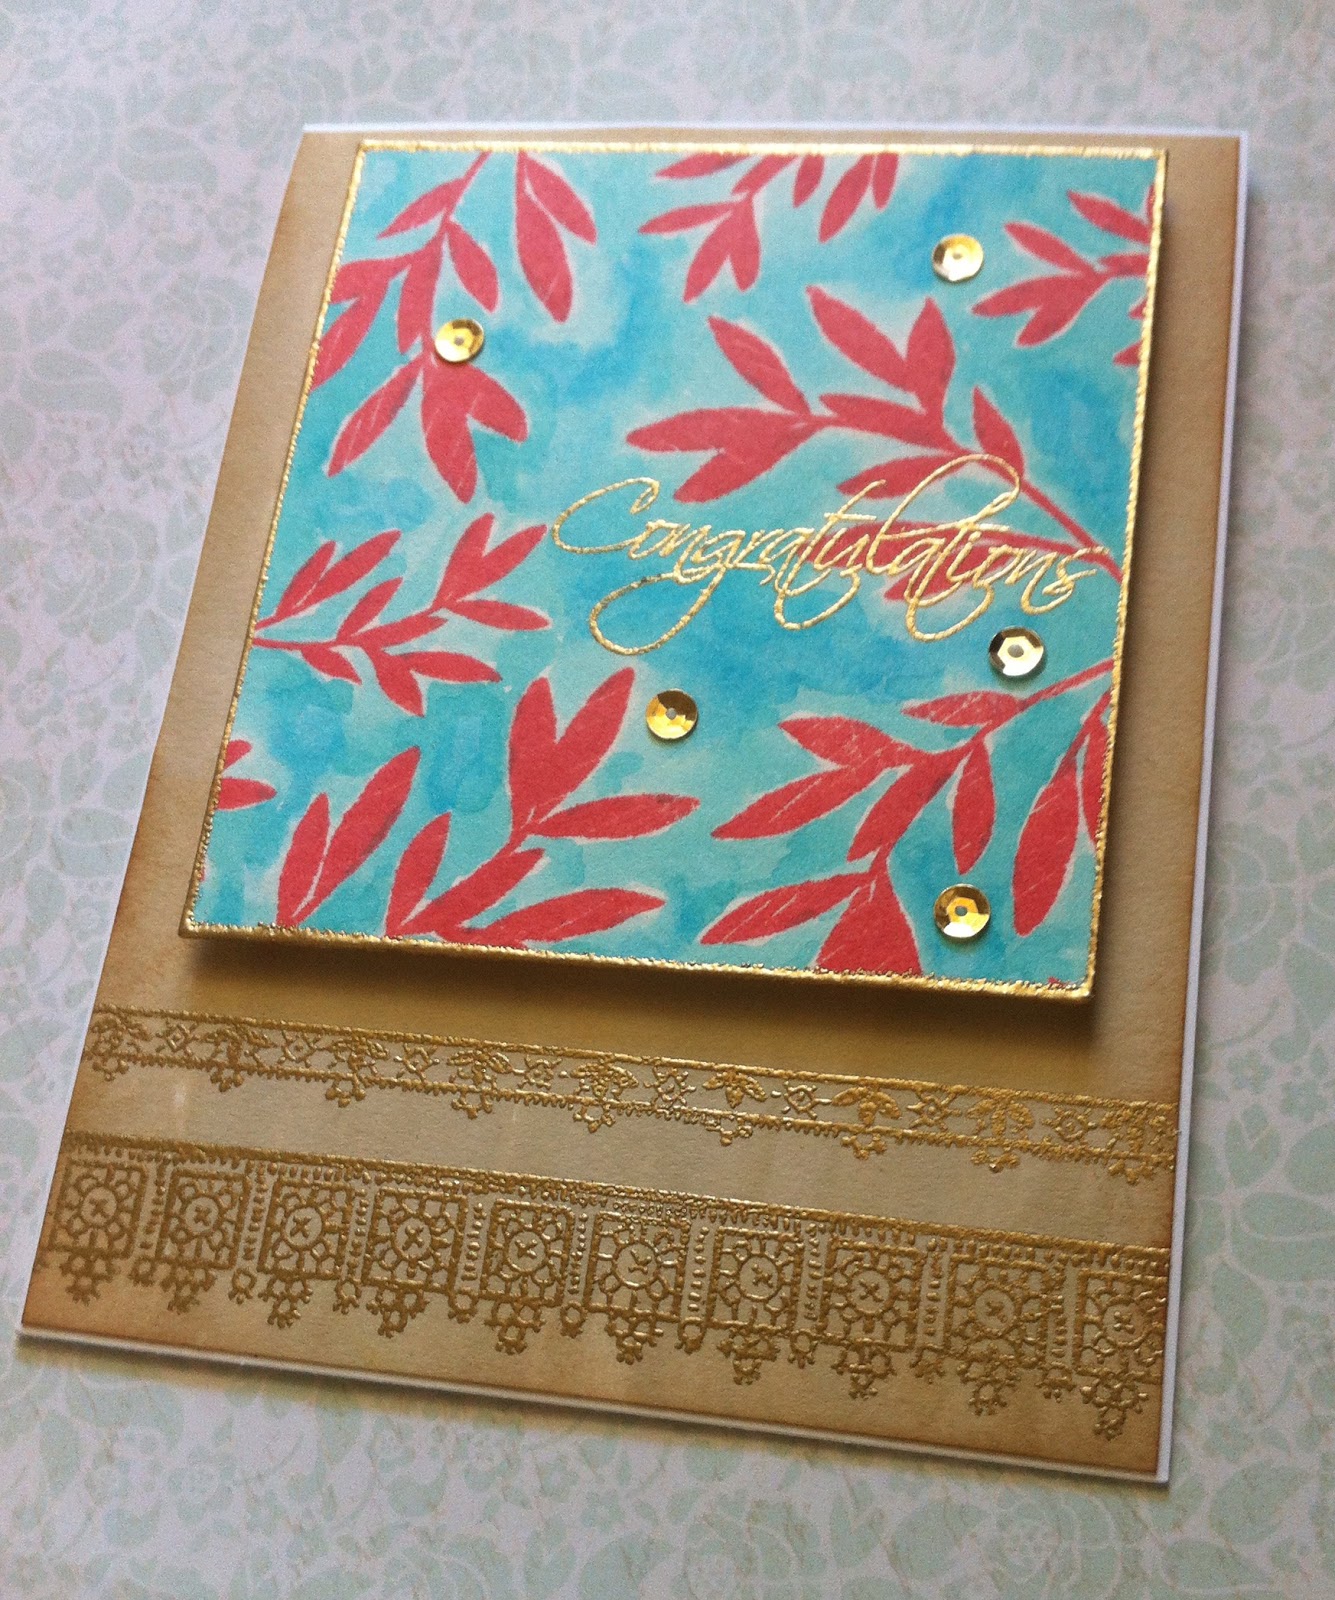
Recently I have had a thing for a coral red with teals and blues. I think that this card kind of has an eastern feel to it. The gold embossing was perfect for Simon Says Stamp Monday Challenge and their "Royal" theme. 


The first thing I did was to stamp the leaves from WPlus 9's Spring Blooms in their Flamingo pure color ink on water color paper. When it had dried I water colored around the leaves with Peacock feathers and Mermaid lagoon distress inks and a water brush. For my background piece I took the whole distress ink pad in Antique linen and swiped it across a white paper till I had the coverage I wanted. The edge also has Vintage photo distress ink softly applied with a blending tool around it. 
All of the embossing was done with Hero Arts gold embossing powder. The leaf panel was popped up on fun foam and then the card was assembled. And for a crowning royal touch, so gold sequins for a lovely congratulatory card. 

I am trying to get involved in more challenges to stretch myself, help myself grow, and try new things. Card making gives me a creative outlet and I get to encourage others, but right now I feel a little lost. Not sure but I feel like I need a bit more direction.